


What is Cognitive Services?
Azure Cognitive Services provide cloud-based artificial intelligence (AI) capabilities, enabling developers to integrate cognitive intelligence into their applications without requiring in-depth AI or data science expertise. Essentially, these services offer an abstraction layer across five main AI areas:
- Vision
- Speech
- Language
- Decision
- Azure OpenAI services
They are available through Rest APIs and client library SDKs in popular programming languages.
What you can achieve by implementing Cognitive Services in your project?
First and foremost, incorporating artificial intelligence into your business can greatly contribute to achieving your objectives. In today’s competitive global market, companies leveraging AI gain a significant advantage.This often entails delegating repetitive tasks to AI, thereby increasing efficiency and productivity.
Real-world scenario
In a practical example from a project I was involved in, we successfully implemented an Azure Cognitive Service feature that proved to be highly beneficial. Our client was able to enhance their manual process by utilizing the Form Recognizer service to automate invoice uploads. Instead of laboriously entering invoice information into the system by hand, the task is now performed automatically with the help of Cognitive Services, streamlining the process and increasing efficiency.Tutorial part
Business case
In this example implementation, we’ll discuss a smart city use case. The proposed solution enables ambulances to automatically trigger red lights for all other vehicles at an intersection, allowing them to pass through safely and unimpeded. This intelligent traffic management system contributes to enhanced public safety and more efficient emergency response times.Please, note that this example is a simplified and potentially flawed use case, intended for demonstration purposes only. In real-world applications, it’s crucial to consider various factors, constraints, and potential issues that may arise in order to develop a robust and effective solution.
Azure Cognitive Services Resource
- 1. Go to Azure Portal and create a Cognitive Services resource

- 2. Sign to https://www.customvision.ai/
- 3. Create a new project

- 4. Upload images to train the model.

- 5. Train the model.

- 6. Get the results from training

- 7. Publish your 7. Publish your model and retrieve the prediction URL and key

Sample Python/Flask Application
This Python application utilizes the Flask framework and Cognitive Services to identify objects in images supplied via URLs. The application is specifically designed to recognize images of cars or ambulances.
The workflow of the application is straightforward. Upon receiving an image URL, the application forwards the URL to Cognitive Services for object identification. It then determines the appropriate color for a traffic light based on the identified object (a car or an ambulance). This information is subsequently relayed to the front-end application for display.
Here is a simplified breakdown of the core functionality:Code is pretty simple and straightforward.
    # URL of the published Cognitive Services function
    url = "<Insert URL Here>"

    # Header for the request
    headers = {"Prediction-Key": "XXX"}

    # The image is taken from the JSON request
    json = request.json
    image = json['image']

    # Data for the request
    data = {
        "Url": image,
    }

    # Request is sent to Cognitive Services
    requset = requests.post(url, headers=headers, json=data)

    # JSON response is obtained from the request
    json = requset.json()
    predictions = json['predictions']

    # The first prediction is used as the result
    result = predictions[0]['tagName']

    # Traffic light color is determined based on the result
    light_color = 'red' if result == 'ambulance' else 'green'

    # A JSON response is created with the traffic light color and the prediction
    response = jsonify({'light-color': light_color, 'prediction': result})

    # Access control header is added to the response
    response.headers.add('Access-Control-Allow-Origin', '*')

    return response

    url = "<Here Url of Cognitive Search published function>"

    headers = {"Prediction-Key": "XXX"}
    json = request.json
    image = json['image']

    data = {
        "Url": image,
    }

    requset = requests.post(url, headers=headers, json=data)
    json = requset.json()
    predictions = json['predictions']
    result = predictions[0]['tagName']
    light_color = 'red' if result == 'ambulance' else 'green'
    response = jsonify({'light-color': light_color, 'prediction': result})
    response.headers.add('Access-Control-Allow-Origin', '*')
    return response

if __name__ == '__main__':
    app.run()
To run this application, simply execute the Python script in the environment where Flask is installed:
if __name__ == ‘__main__’:
app.run()
Frontend app
The front-end of our application is a streamlined HTML page, utilizing JavaScript functions for its operation and Leaflet’s open street map for location visualization.
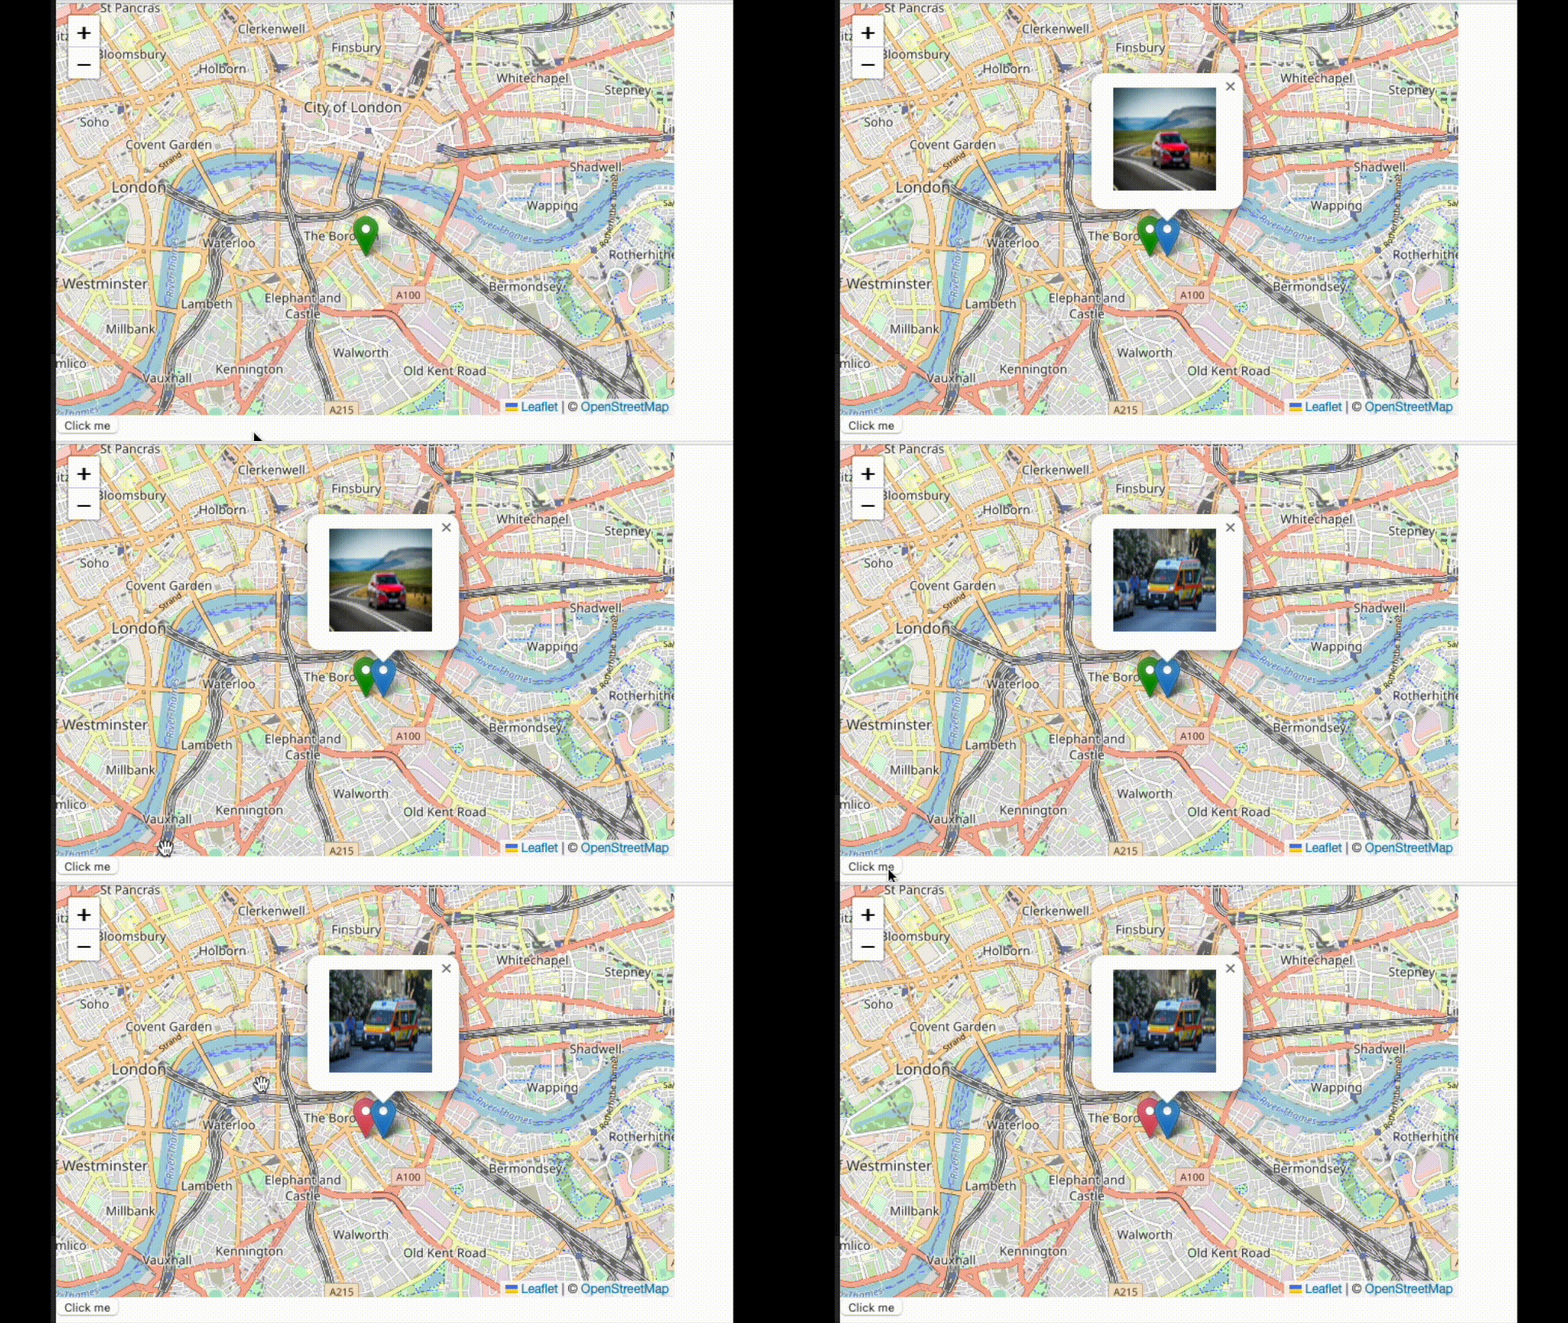
The primary function of this application is initiated when a user clicks the “spawn” button, which randomly generates either a car or an ambulance on the map. This simplistic design focuses on demonstrating the core concept without introducing unnecessary complexity.
Here’s a glimpse into the map-related code:
const map = L.map('map').setView([51.505, -0.09], 13); const tiles = L.tileLayer('https://tile.openstreetmap.org/{z}/{x}/{y}.png', { maxZoom: 19, attribution: '© <a href="http://www.openstreetmap.org/copyright">OpenStreetMap</a>' }).addTo(map);
The ‘spawnVehicle’ function plays a vital role in the app. It randomly selects between the URL of a car or an ambulance. This function also adds a marker to the map and calls the backend Flask application to determine if a change in traffic light color is required.
Here’s how the spawnVehicle function is implemented:
async function spawnVehicle() {
    randomVehicle = getRandomInt(2)
    vehicleUrl = randomVehicle ? carUrl : ambulanceUrl

    const marker2 = L.marker([51.5, -0.087]).addTo(map)
        .bindPopup(`<image src = ${vehicleUrl} style="width:100px;height:100px;"></image>`).openPopup();

    result = await fetchAsync('http://127.0.0.1:5000/', vehicleUrl)

    if (result['light-color'] == 'red') {
        marker._icon.classList.remove('huechangegreen')
        marker._icon.classList.add("huechangered");
    }
The traffic light change is simulated by adding a class that changes the color of the marker:
<style>
    img.huechangegreen { filter: hue-rotate(260deg); }
    img.huechangered { filter: hue-rotate(135deg); }
</style>
Here’s how it looks when rendered:
Summary
Incorporating AI into your business can lead to substantial improvements in your position within the global marketplace. AI is incredibly versatile and can offer numerous innovative ideas for implementation. If you’re interested in developing an AI-powered cloud solution with us, we’re here to help you explore the possibilities and bring your ideas to life.